

Most extrusion defects are not found at the press.
They are found at the anodising line, in your workshop, or on site. By then the profile is 3,000 km away and ten weeks into your programme.
This article lists nine defects. Five of them you can see the moment the profile leaves the die. Four you cannot. Those four are the expensive ones.
In short
– Six variables decide almost every extrusion defect: the billet, the temperature, the speed, the die, the quench, and handling after the press.
– Twist and bend are usually die and cooling problems. They are rarely operator mistakes.
– A coarse grain ring is invisible at the press. It shows up after anodising as a lighter band.
– A seam that has not welded still measures correctly. It passes the caliper and fails in service.
– The back end of every billet carries oxides into the profile. It has to be cut off.
– White rust is not a coating failure. It is a packing decision, made before the container is closed.
1. Six things decide almost everything
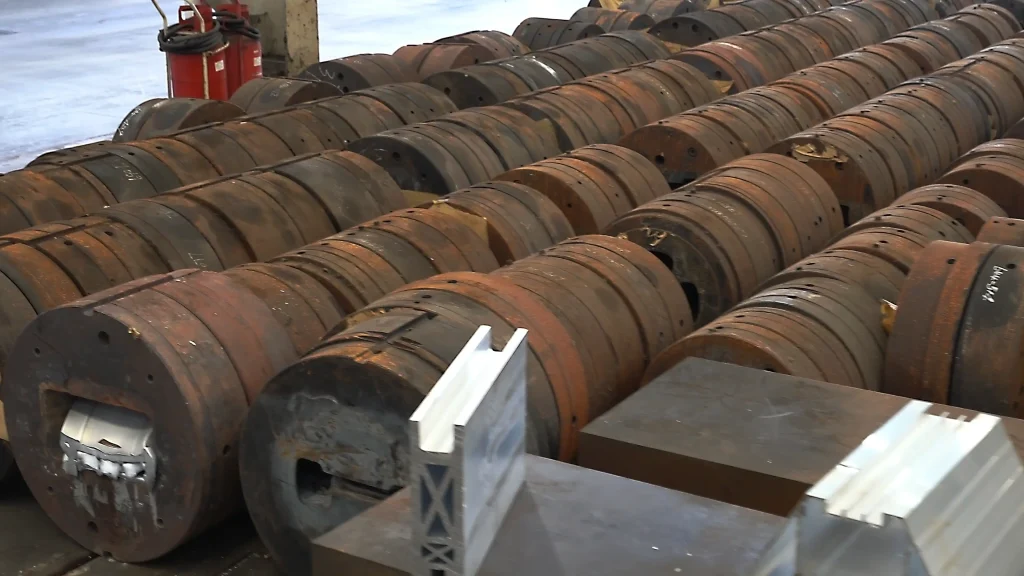
Extrusion looks complicated. In practice, six variables decide most of it.
The billet.The alloy, the hydrogen content, and the surface quality. A dirty billet surface is the source of every inclusion defect later.
The temperature. Billet, container and die. They should sit in a narrow band, not at three different values. The die runs hot as well — close to billet temperature, and it drifts during a run. [3]
The speed. Speed and exit temperature are one decision, not two. Push the ram faster and the exit temperature climbs with it.
The die. Bearing length, port ratio, welding chamber. Most shape defects are decided here, not at the press.
The quench. Cooling rate decides strength. It also decides grain structure at the surface.
Handling and packing. Everything after the press: run-out table, cooling bed, cutting, wrapping.
Every defect in this article sits behind one of those six doors. Fix the six and defects stop being random.
2. Five defects you can see at the press
Twist
The profile turns along its length. Your fitter sees it at the corner joint.
Twist is usually not a press fault. Most of the time it is a die with bearing lengths that are not the same on both sides of the profile. Uneven cooling adds to it.
The fix is a die fix. Balance the bearings. Check the port layout is symmetrical. Then check the cooling on both sides of the run-out table.
EN 12020-2 covers twist on precision profiles in EN AW-6060 and EN AW-6063. It defines how to measure twist, and it tabulates the limit by profile width and length. Ask for the measurement, not for an opinion. [6]
Bend and camber
Bend is up and down. Camber is left and right. Both come from uneven cooling or uneven stretching.
The fix is airflow balance across the profile, plus stretching. Stretching straightens the profile and relieves stress. Do it consistently, not by feel.
Wave
Wave is a speed problem wearing a die’s clothes.
Thin walls and wide faces wave. Run the ram faster and it gets worse. The metal leaves the die faster than the section can hold.
Slow down. If that costs too much, lengthen the bearing or add a rib to the section. Both are cheaper than sorting scrap.
Die lines and streaks
Long lines along the profile come from the bearing. Aluminium sticks to a rough bearing. It also sticks to a bearing whose nitriding has worn through.
The fix is polishing, plus a nitriding schedule that is actually followed. Track die life. Replace or re-polish before the surface fails, not after.
Scratches
Scratches are the one defect on this list that the press almost never causes.
They happen after it. On the run-out table, the cooling bed, during handling, and in the stillage. Packing profiles against each other without separators scratches them.
Felt or graphite rollers, separators between profiles, and a wrapping step solve most of it.
What to ask. Ask for twist and bend measurements, not for a statement that the profile is straight.
3. Four defects you only see later
This is the group that costs money. None of them is visible at the press.
Coarse grain ring
The surface layer of the profile recrystallises into large grains. The core stays fine. The result is a ring of coarse grain around the section.
You cannot see it on the press. You see it after anodising. The ring etches and anodises differently from the fine core, so it reads as a band that does not match. [7]
Coarse grain also lowers tensile strength, fatigue resistance and fracture toughness.
It gets worse with a high extrusion ratio, a high exit temperature and a slow quench. One study on 6xxx alloy put the onset above roughly 460 °C exit temperature. [10]
Alloying additions such as manganese, chromium and zirconium help control it. They form dispersoids that pin the grain boundaries. Homogenising the billet properly matters too.
The practical levers are exit temperature and quench rate. Keep the exit temperature inside the window, and cool the profile close to the die.
If a project is anodised and colour-critical, say so before the order. It changes how we run it.
A seam that did not weld
Hollow profiles are made on porthole or bridge dies. The metal splits into streams around the bridge. It rejoins in the welding chamber and welds under pressure.
If the pressure is too low, or the chamber is too small, the seam does not weld. The profile still measures correctly. Every dimension can be inside tolerance.
It fails later. It can crack during bending, machining or in service.
Weld quality depends on die design: port ratio, welding chamber height, and extrusion ratio. Billet surface cleanliness matters too, because oxides do not weld.
Industry verifies seams with a macro-etch test on a cross-section, or a fracture test. Those are laboratory tests, not press-side checks. [13] We are extruders, not a test house. If seam integrity matters for your part, ask who runs the test and who signs the report.
Back-end defect
At the end of every stroke, the billet skin is drawn into the core of the profile. Oxides, dirt and the remains of the billet surface end up inside the metal.
This is a shrink or tail defect. It is not always visible. Sometimes it is a hollow, sometimes an inclusion.
There is only one fix: cut it off. How much you cut depends on the press, the die and the billet. It is set by trial, and it is measured in millimetres of profile. Be careful with anyone who quotes a fixed percentage. [11]
A dirty billet makes it worse. The skin on a billet runs from 0.05 mm to 0.5 mm thick, and the oxides sit in that skin. [12]
We cut to the length your order requires. If you need a longer cut-off, say so and we will price it in. Cutting more is the cheapest honest thing in this whole process.
Mechanical properties out of spec
The certificate says 6063-T6. The profile in your hand may not be.
Properties are lost in the first seconds after the die. If the quench is too slow, or the exit temperature too low, the alloy never fully dissolves its strengthening elements. Aging later cannot put them back.
The hidden variable is wall thickness. A 2 mm wall and a 6 mm wall do not cool at the same rate. Same die, same billet, same temper on the paper — different material in service.
This is why we quench by section, not by habit. And it is why we test by batch.
What to ask.Ask which test the certificate came from, and when it was taken.
4. The die decides more than the press does
The die is not a tool. It is the design.
Bearing length controls metal flow. Port layout controls balance. Welding chamber height controls seam quality. Rib and wall geometry control whether the section can be extruded at all.
Most of the shape defects in this article are decided on the drawing board. By the time the die is in the press, the options are narrow.
Two habits pay for themselves. First, keep bearing records per die and re-polish on a schedule. Second, track die life and re-nitride before the surface fails. A die’s life is managed, not purchased.
One more: send the section for review before you pay for tooling. There is no cost to that question. If the section cannot be extruded at a sensible price, the answer is cheaper in week one than in week six.
5. Strength is won or lost in the first two seconds
Extrusion is a heat treatment. The press does the solution treatment, and the quench freezes it.
For 6063 and 6063A, the exit temperature should reach roughly 500 °C or above, with the solution window around 500–525 °C [1]. For 6061, the target is higher, around 510 °C or above [1].
Then the profile must cool. It should be under about 200 °C when it leaves the quench zone. [2] Above that, the properties you specified are no longer guaranteed. How fast it must cool depends on the alloy — and on the wall thickness. [8]
After that comes aging. For 6063-T5, typical practice sits around 185–205 °C for one to four hours. [4] For 6061-T6 it is usually a longer soak at a lower temperature, in the region of 175 °C for eight hours. [15]
6061 is a different animal. It needs a fast quench — water, not air. Cool it quickly, then let the structure stabilise, then age. Slow it down and the strengthening elements precipitate before aging can do its job. You cannot recover that afterwards.
EN 755-2 sets the minimum values. For 6063-T6, wall thickness up to 10 mm: Rm at least 215 MPa and Rp0.2 at least 170 MPa. From 10 to 25 mm the minimums fall to 195 MPa and 160 MPa. [5]
6061-T6 has its own row in the same table. There, Rm is at least 260 MPa and Rp0.2 at least 240 MPa. [16] Ask for that row against your order. And ask whether the values assume press quenching.
We do not ask you to trust a certificate. We ask you to ask which test it came from.
6. Nine problems are made at the factory. The tenth is made at sea.
Your profile spends four to six weeks in a steel box crossing the sea. The box is wet.
Water condenses on the container ceiling at night, and drips onto your profiles. Where profiles touch, a thin film of water sits between them for weeks.
The result is white rust. A white, chalky deposit on the surface. It is not a coating failure and it is not anodising failure. It is moisture, and often chlorides, sitting in the wrong place. [9][14]
White rust is a packing decision. It is decided before the container is closed.
Practical measures: dry the profiles before packing, keep separators between them, wrap them, and control the moisture inside the container. VCI paper or film, and desiccants, are the common tools. [9][14]
We wrap profiles in paper as standard, and we pack to your specification. If your route is humid or your profiles are anodised, tell us and we will pack accordingly.
7. What we check before the container leaves
Here is the list, in the order we run it.
First, shape. Twist and bend, because your fitter notices those first. Measured, not eyeballed, and judged under EN 12020-2. [6]
Second, surface. Die lines, streaks, scratches and orange peel, checked under proper light — not in the office.
Third, the finish. Our anodising and powder coating are done in house. Film thickness and colour are checked per batch, and the batch and tank records stay with the order.
Fourth, the cut. Profiles are cut to the length your order requires, including the back-end cut.
Fifth, packing.Wrapping, separators and stillage, to your specification.
We are extruders. We are not your structural engineer, and we are not your testing laboratory. What we can sign is the state of the profile when it leaves our gate.
| CODE | Defect | Where you first see it | Main cause | What prevents it |
|---|---|---|---|---|
| 1 | Twist | At the corner joint | Unbalanced die bearings; uneven cooling | Balance the bearings; balance the cooling |
| 2 | Bend and camber | When the profile will not sit flat | Uneven cooling; uneven stretching | Balanced airflow; consistent stretching |
| 3 | Wave | On wide, thin walls | Ram speed too high | Slow down; lengthen the bearing; add a rib |
| 4 | Die lines and streaks | On the surface, in raking light | A rough bearing; nitriding worn through | Polish on schedule; re-nitride before failure |
| 5 | Scratches | After the press, not at it | Run-out table, cooling bed, stillage | Felt or graphite rollers; separators; wrapping |
| 6 | Coarse grain ring | After anodising | High exit temperature; slow quench | Cap the exit temperature; quench close to the die |
| 7 | A seam that did not weld | In service, or after machining | Low welding-chamber pressure; poor die design | Die design; clean billet; a macro-etch test |
| 8 | Back-end defect | Sometimes never — it is inside the metal | Billet skin drawn into the core | Cut it off; set the discard by trial |
| 9 | Properties out of spec | At the test, or in service | A quench too slow for the wall thickness | Quench by section; test by batch |
| 10 | White rust | After the sea crossing | Condensation between stacked profiles | Dry the profiles; separate; wrap; control container moisture |
FAQ
What causes twist in an extruded aluminium profile?
Twist usually comes from the die, not the press. Bearing lengths that differ across the section push the metal unevenly. Uneven cooling on the run-out table makes it worse. The fix is a balanced die and balanced cooling. EN 12020-2 defines how twist is measured on precision profiles. Ask for the measurement rather than a verbal assurance.
Why is my profile a different colour after anodising?
A coarse grain ring is the usual cause. The surface layer recrystallises into large grains during extrusion. Those grains anodise to a slightly different shade, so the edge reads lighter or a stripe appears. High exit temperature and a slow quench make it worse. Tell your supplier before the order if the project is colour-critical.
What is a back-end defect?
At the end of each stroke, the billet skin and its oxides are drawn into the core of the profile. The result is a shrink, a hollow, or an inclusion. It may not be visible from outside. The only fix is to cut that part off. How much to cut is set by trial for each press and die, and it is measured in millimetres of profile. Ask your supplier how they set it, and whether they set it by trial or by habit.
How do I know whether a hollow profile’s seam has welded?
You cannot see it from the outside, and dimensions will not tell you. Industry uses a macro-etch test or a fracture test to check the weld. These are done in a laboratory. If seam integrity matters for your part, ask in advance who runs the test and what the acceptance criteria are.
Why does 6061-T6 cost more than 6063-T6?
Because it needs a different process. 6061 requires a fast quench, normally in water, and a higher exit temperature. It has to stabilise before aging. That slows the line and adds handling. EN 755-2 sets the minimum mechanical values for both alloys. The alloy follows the application, not the price list.
What is white rust and how do I prevent it?
White rust is a white, chalky deposit caused by moisture sitting between stacked profiles for a long time. Container condensation during a sea crossing is the usual trigger. It is not a coating failure. Dry profiles before packing, keep separators between them, and control container moisture with wrapping, VCI material or desiccants.
Which standard applies to my profile, EN 755-9 or EN 12020-2?
It depends what you ordered. EN 12020-2 covers extruded precision profiles in EN AW-6060 and EN AW-6063, with tighter dimensional and form tolerances. EN 755-9 covers general extruded profiles. European designers often specify EN 12020-2 for window and façade profiles. Ask which one your drawing calls up before you order.